Tuesday, May 24, 2011

quarter ready

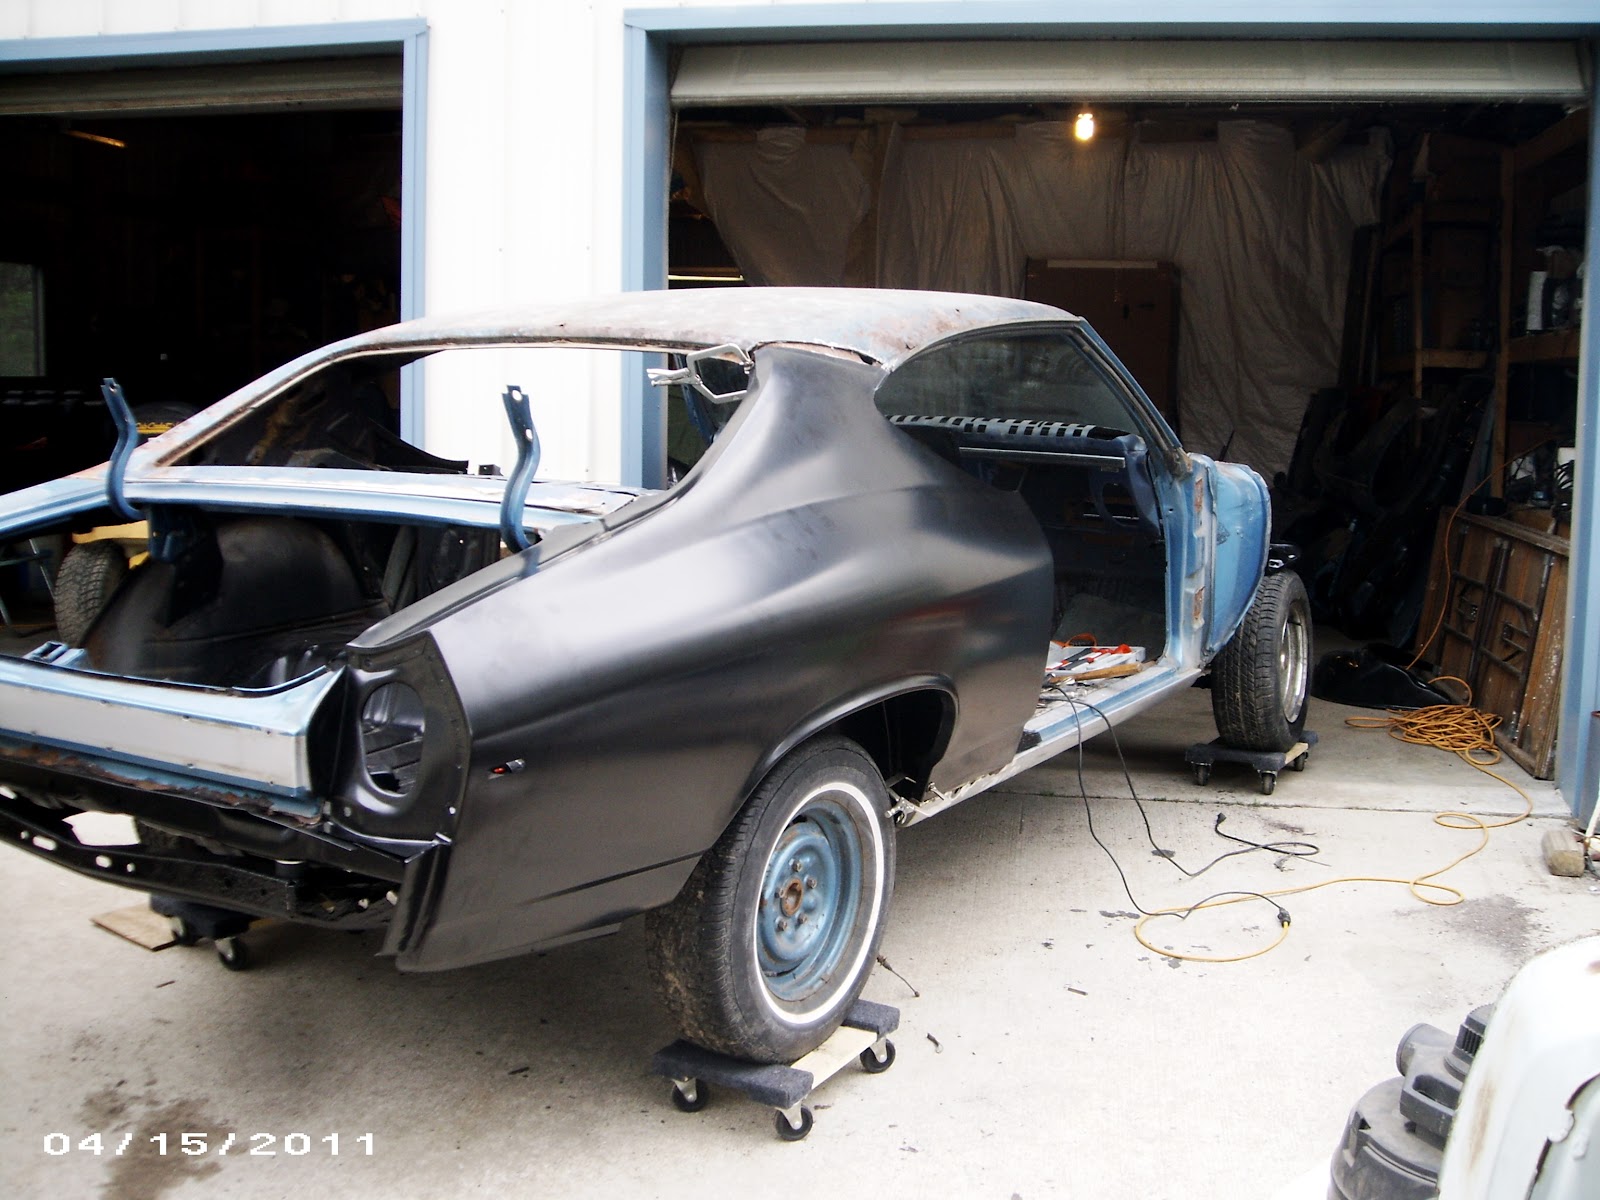
This whole time since the last post has been spent taking the quarters off, tweaking here, putting the quarters on, back off....

I'm betting we have had them on and off over 100 times. Once we get the roof drip rails on we will finally be ready to put the quarter panels in for good.

No particular order


Nolan cleaning up the inside of the rocker.


We glued the rocker repair piece on the drivers side. Here is the finished product.


This is the welded side.


We put the hood and fenders on for fun. They're coming back off soon


Turned around and saw this 5 foot black snake staring at me.


Year of the Locust.


Nolan welding in the wheel wells.


It's all about the door gaps. This one is as good as we can get. There's a few welding tricks we'll do down the road to close the gap up a bit.


I just like this photo


Bumper and rear light units


boy and car


Friday, April 22, 2011

replacing metal

Now that all the parts are in, we are in the process of mocking up the car. Using clamps and sheet metals screws, we'll put most of the car back together. We've already made a few minor mistakes. We screwed up the roof drip rails and the old quarter rain gutters. I had assumed the new metal would come with those.

Once we mock it all up and are sure of the fit, we'll take the quarters off and epoxy primer all the new stuff.

Passenger side wheel wells being placed


Passenger Side Quarter Panel in place

Drivers side wheel well going into place


Both Sides on roof off.
Tomorrow will be spent getting a better fit on the drivers side.


Dinner. Rice with Cilantro/mint/cashews and lime. Chicken soaked in coconut milk, tumeric, garlic and lime.

Monday, April 11, 2011

Trunk Panel installation and more

It's been a bit since I updated. We've been waiting on sheet metal to come and due to structural reasons, we could not go further. We did manage to work a bit on fenders and the radiator support.

Cleaned and painted the front seats. They won't be used in this car as we'll go with buckets. But it sure came out good.


Did a little sand blasting too.


This weekend we put in the one piece trunk pan. It went in pretty easy and all the frame/body bolts matched up. That was nice to see.

New floor pan

We are close to having the right wheel well out which will then let us install the innner and outer wheel wells and then the full quarter. Once those are all clamped and screwed into place, we'll do the left side.Then the tail lamp panel, then maybe the roof.


How many people ever break a car down this far?


Sunday, February 27, 2011

Body back on frame

Using Chains and misc parts we built a harness to lift the body off the body cart and back onto the body. Bolts were attached to the seat belt holes.

 We had hoped to only use one engine hoist to do this but it would not fit under the body cart. We had to run a fence timber under the chains and use 2 hoist.

We used a timber in the back for some support.

 slowly putting the body down on the frame. Got the wood dolly's for $6 each. They will make pushing the body/frame around in the shop easier.


Getting closer to the frame


Looking down thru the trunk pan. That's the next piece to get replaced.


Totally inside at last. 


Sunday, February 13, 2011

The body work begins

We finished up the frame and torqued everything down to spec. And thanks to a friend who noticed the brakes, we put switched out the shoes to the right spot.

Wrong

Right
Thanks Greg

We now are moving on to what I suspect will be the slowest job of the whole project. The body prep work.  We began by building a body cart as the entire rear of the body has to be cut away and replace.

Red neck body cart.
It is not the steadiest thing in the world but with a stack of tires properly place under as a safety catch we are going to remove and replace the rear of the body. Then we can place it on the rotisserie.


The trunk panel is wasted, so are the inner and outer wheel wells and so are the quarter panels. All of it will be replaced. Lots of cutting, grinding and drilling to be done.


Just a few small good things
Dinner was good - the home made pickles were killer.


Scored this from the bro-in-law. They are gunna tie the car together.
Swap meet next weekend then time to order a massive pile of metal.


Friday, January 28, 2011

Odds and ends

We installed the calipers last night. It was a bit of a struggle getting the drivers side on but they are both on now. My son tackled the drivers side and became frustrated with the whole thing. After he calmed himself down, he returned to it and it was not such a chore. I've been there many times in many situations. There's gotta be something to being in a "Zen" state. We still need to go back thru the front end and make sure we have everything tightened down to specs.


Remember that rusted steering bolt that was broken off and stuck in the steering box? I took it to a machine shop where they first tried heading up the steering box. It still would not come out. They finally welded a washer to the nub and it came out. Whew.


Steering box and the other end of the problem. Look at how rusted that bolt is. Amazing.

Other stuff we have going on.

I masked cleaned, masked off and painted one of the door panels. I am using the SEM vinyl paint and I am getting pretty good results.

The unpainted side


The painted side


My son has also been busy cleaning up the rear end of the car. We'll probably paint it with POR 15 this weekend. The drums came off easily which was a relief. We are going to keep the drum rear brakes and re-use them.


My dog is totally hating winter.


It's been a tough winter.

Sunday, January 23, 2011

Steering arms

Our hope was to have the front end built last night. A little problem came up when we realized our steering arms were gone. We think they made it to the scrap yard with our front drum brakes.

No problems though. My brother in law pulled a 67 frame out of the snow with his tractor.
My son and I then spent the next 3 hours hammering, heating, cutting, swearing and finally getting the coveted steering arms. We prepped and painted the arms and went to bolt them in. The holes were too small for the 1/2 inch Power Brake kit bolts. A trip to the hardware store for a 1/2 inch high speed steel bit was in order.

Funny thing was only the drivers side had to be drilled. The passenger side was fine.


Good thing the brother in law has a nice drill!


My son torquing the bolts.

Today we hope to work on hooking up the tie rod ends, sway bar, center link and a few other odds and ends. We'll also begin to prep the rear end too. Control arms and stuff.


 We still have to try and get a bolt out of the steering box. The end broke off due to rust and corrosion. It is soaking in Parts blaster now. I think it may have to be drilled out. We'll see. New steering boxes are $200 + so I aim to get that bolt out.